How to Perform Hip Hemiarthroplasty Using the Hardinge Approach
Source
To access the full video and additional content on this subject, log in or subscribe
Summary
Focus: Hip hemiarthroplasty addresses displaced femoral neck fractures by replacing the femoral head and neck with a prosthesis to restore hip function and enable immediate weight-bearing.
Key elements: The procedure uses the Hardinge approach, with partial release of the gluteus medius and minimus, anterior capsulotomy, femoral neck resection, femoral canal preparation, cemented stem implantation, component trialing, stability testing, and secure abductor repair.
Indications and Clinical Context
General
Medical experts: Lasse Rämö, orthopedic surgeon
Name of procedure: Hip hemiarthroplasty — Hardinge approach, modified Hardinge approach, direct lateral approach, DLA
Goal of Operation
To replace the fractured femoral neck and head with a prosthetic implant, aiming to restore the stability and function of the hip joint and facilitate early mobilization.
Problem
A femoral neck fracture.
Diagnosis
Femoral neck fracture, ICD-10: S72.0
Short Pathophysiological Description
A femoral neck fracture significantly impairs mobility, which is particularly problematic for elderly patients, as prolonged immobility can lead to muscle atrophy, deep vein thrombosis, and a decline in overall health. Femoral neck fractures are associated with increased mortality.
When displaced, the fracture typically disrupts the blood supply to the femoral head, leading to a risk of avascular necrosis, which supports the choice of arthroplasty over other treatment methods.
In elderly patients or those with poor bone quality, these fractures are often due to low-energy trauma, such as a simple fall.
Hip hemiarthroplasty replaces the damaged femoral head and neck with a prosthesis, allowing early weight-bearing, eliminating the risk of avascular necrosis, and improving functional outcomes. By facilitating early mobilization, it reduces the risk of complications associated with prolonged immobility.
Key Anatomical Structures
Greater trochanter of the femur
Lesser trochanter of the femur
Anterior superior iliac spine, ASIS
Gluteus medius and minimus
Joint capsule
Femoral head and neck
Superior gluteal nerve
Acetabulum and labrum
Step-by-Step Technique
Procedure Goal
Hip hemiarthroplasty addresses displaced femoral neck fractures where compromised blood supply makes bone healing unlikely. By replacing the femoral head and neck with a prosthesis, hip function is restored and immediate weight-bearing is enabled.
Biomechanically, this is assessed through leg length and offset, which are restored through correct stem alignment, size and depth, and neck angle and length. Stability of the prosthesis also depends on correct head size, secure fixation of the stem, and soft tissue repair. Component selection is typically guided by preoperative templating and confirmed through trialing.
Using the Hardinge approach, the gluteus medius and minimus are split to reach the joint in the anterior direction. After capsulotomy, the hip is dislocated in an anterior direction.
The femoral head and neck are resected and replaced with prosthetic components, secured by a stem cemented into the prepared femoral canal.
Log in or subscribe to access full content and see all the images.
Patient Positioning, Anesthesia, and Preparation
The patient is positioned in a lateral decubitus position with the affected hip facing upward.
The pelvis is stabilized in a neutral position, avoiding tilting, using supports anteriorly and posteriorly.
After hip dislocation, the lower leg is placed anteriorly in a sterile bag, requiring space in front of the patient.
Either general or spinal anesthesia can be used.
Landmarks and Incision Site
To be able to dislocate the hip anteriorly, broach the femur, and implant the components via the Hardinge approach, a correctly placed skin incision is necessary.
The skin incision is placed by the location of the greater trochanter.
The anterior edge, tip, and posterior edge of the greater trochanter and the femoral shaft are palpated and marked.
The anterior superior iliac spine, ASIS, is palpated and marked for overall orientation of the pelvic position.
The incision is planned at the midline of the lateral surface of the greater trochanter or slightly anterior in the AP direction.
The hip is later dislocated anteriorly by external rotation. The incision must be positioned to allow this. If placed too posteriorly, reaching the anterior structures becomes difficult.The incision begins approximately 5 cm proximal to the trochanter tip to allow hip dislocation and adequate working space for instruments. However, extending further proximally risks injury to the superior gluteal nerve coursing under the gluteus medius muscle.
The incision extends distally in line with the femoral shaft, ending approximately 10 cm inferior to the trochanter tip to allow adequate distal exposure for femoral preparation.
Skin Incision and Advancing to Fascia Lata
The skin is incised with a scalpel according to the planned line, advancing through the skin layer into the subcutaneous tissue. There are no critical structures directly beneath the skin at this level.
Hemostasis is secured with diathermy.
Subcutaneous tissue is incised with a scalpel or diathermy, and retractors are placed to improve visibility if needed.
In cases with thicker subcutaneous tissue, the greater trochanter can be palpated to maintain orientation and intended direction toward its lateral surface.
With the fascia visible throughout the length of the incision, the subcutaneous layer may be slightly mobilized from the fascial surface to facilitate later fascial closure.
Opening the Fascia and Placing the Charnley Retractor
The greater trochanter is palpated to confirm the fascial incision site on its lateral surface, approximately midline or slightly anterior in the AP direction.
The fascia is incised with a scalpel or electrocautery to create an initial opening.
The gluteus maximus muscle fibers are visible posteriorly beneath the fascia and can be bluntly separated.
The fascia opening is extended distally and proximally with scissors in line with the skin incision to match the incision’s length.
Underlying muscle fibers are separated bluntly, advancing toward the lateral greater trochanter. Typically, some bursal tissue is present in this layer.
When the fascial opening is complete and the lateral part of the greater trochanter is visible, a Charnley retractor is placed at mid-wound level.
The sciatic nerve runs deep and posterior in the modified Hardinge approach and is typically not endangered. Nevertheless, the posterior retractor blade is kept superficial, at the fascial level.The lateral surface of the greater trochanter is now exposed. The gluteus medius tendon attachment is visible beneath the overlying bursal tissue.
Detaching the Gluteus Medius and Minimus
The gluteus medius and minimus are partially released from the anterior trochanter to expose the joint capsule. The posterior muscle attachment is preserved for abductor function. Proximal dissection is limited to 3–5 cm above the trochanter to protect the superior gluteal nerve.
The bursa overlying the muscle is opened first to expose the gluteus medius tendon beneath.
The greater trochanter is palpated to define the incision site of the gluteus medius tendon insertion: at the midline or slightly anterior of the greater trochanter lateral surface.
Incising down to bone level from the tip of trochanter to the vastus lateralis insertion level.
The anterior gluteus medius tendon is elevated as a flap along the trochanter surface.External rotation of the hip allows the medius flap to be lifted anteriorly, improving exposure.
The retractor is repositioned to allow the incision to continue superiorly toward the acetabulum.
Proximal to the trochanter tip, the gluteus medius muscle is split bluntly in line with its fibers. The dissection must not extend too far proximally, 3–5 cm, to preserve the superior gluteal nerve running between the gluteus medius and minimus.
The Charnley retractor can be placed deeper to hold the detached medius tendon aside. The gluteus minimus is released from its femoral insertion, in line with the medius release.
With both muscles detached, a retractor can be set to hold the minimus aside. The joint capsule is exposed.
Opening the Joint Capsule
The joint capsule, including its thick integrated anterior ligaments, is opened to expose the femoral neck and allow dislocation.
A T-shaped incision extending along the anterior greater trochanter edge and longitudinally toward the acetabulum provides adequate access.
The capsule is incised along the edge of the greater trochanter using a scalpel or electrocautery. This forms the horizontal limb of the T-incision.
A longitudinal cut extends toward the acetabulum, forming the vertical limb of the T. The incision can be extended to the acetabular labrum, which should be preserved.
The femoral neck is visible underneath the capsule layer.
Dislocating the Hip
With displaced fractures, direct dislocation of the neck and head might not be possible. In those cases, an initial neck cut can be made prior to dislocation to remove the head. With impacted fractures, or in an intact case like this, dislocation of the head and neck together can be done at this stage.
Flexion, external rotation, and traction are applied to the femur, dislocating the head from the acetabulum and bringing the tibia toward the floor. The lower leg is then positioned into a sterile bag.
Retractors are placed above and below the femoral neck for exposing the neck for resection and for soft tissue protection during sawing. They are introduced along the bone, staying inside the capsule, to avoid damaging the deeper structures.
Resecting the Femoral Neck
The goal is to resect the femoral neck at the pre-planned level, typically referenced to the lesser trochanter. This determines prosthesis depth and directly affects leg length and offset.
Leg position is confirmed with the tibia toward the floor. Retractors are in place to protect the medial soft tissues during sawing.
The resection level follows preoperative templating. The greater trochanter tip is palpated to identify the gluteus medius attachment. This must not be violated.
A firm two-handed grip controls the saw. Full power is applied before contacting bone. The resection angle should be perpendicular to the femoral neck axis, avoiding additional tilting of the saw blade.
The superior portion is cut first. The saw is then redirected to the inferior side. On the medial side, the saw tip must not advance too deep. A blunt retractor protects the soft tissues.
The cut can be completed with an osteotome following the saw plane, without leveraging against the greater trochanter.
Bone forceps are applied to grasp the head. Any remaining capsule attachments are freed to detach the head completely.
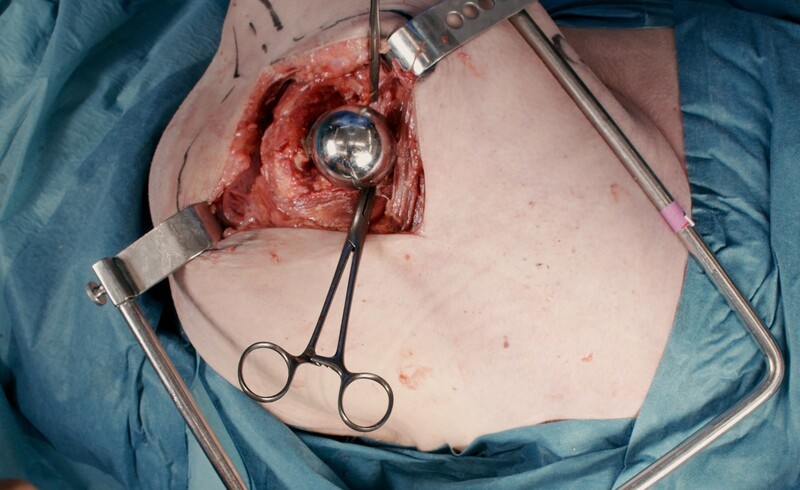
Lastly, the head diameter is measured to guide the prosthetic head sizing.
Opening the Femoral Canal
The goal is to establish lateral entry to the femoral canal, setting the correct orientation for broaching and preventing varus malpositioning of the stem.
Leg position is checked. The tibia pointing toward the floor provides a constant reference for hip rotation.
A curved retractor is placed under the femur to elevate it, improving access for canal preparation.
The junction between the neck and greater trochanter is cleared of remaining tissue to expose the lateral border of the resection level, which will be used as a landmark for the entry point.
The box osteotome is positioned at the lateral border of the resection. The goal is to establish an entry point laterally that allows neutral stem alignment. A medial canal entry site makes varus alignment more likely, which can result in an undersized stem and early loosening.
The canal is opened with controlled mallet strikes, directed along the axis of the femur, just deep enough to create a passage.
With the entry established, a canal finder is inserted laterally and advanced in line with the shaft without levering against bone.
The area is cleared of debris. With the canal open and lateral entry established, broaching can proceed.
Broaching the Canal
The goal is to shape the canal for secure stem fixation with correct depth, alignment, and rotation.
Depending on prosthesis design, typical broaching-related risks are the stem ending up too high or in varus. When broaching, the implant-specific manufacturer’s instructions should be followed.
Leg position is confirmed and the correct side rasp is selected, starting with the smallest size.
The rasp is inserted laterally and kept against the greater trochanter along the femoral axis.
Starting the broaching medially makes varus malposition and an undersized stem more likely.This implant system has built-in anteversion, meaning that the correct neck anteversion is achieved by aligning the rasp with the calcar. Some systems may require anteversion to be estimated and set intraoperatively.
Working the rasp back and forth against the lateral wall maintains lateral positioning and widens the proximal canal laterally.
Controlled mallet strikes are used when advancing the rasp deeper. Excessive force can cause fractures, especially in osteoporotic bone.
The rasp is advanced toward the resection level, then withdrawn. This continues until the rasp sits at the intended depth.
When the rasp reaches the wanted depth but still rotates in the canal, the next size is selected.
The process is repeated with each larger rasp until rotational stability is achieved at the intended depth, confirmed against the templated stem size.The final broach size will be rotationally stable on the planned depth level. The sound of hitting the broach with a mallet will also change when it is in contact with the cortical bone. The handle is removed.
With this model, the actual prosthesis stem will be one size smaller to allow space for cement.
The cut surface is cleaned, and the calcar area is inspected for fissures. The collar of the prosthesis rests here, transferring load directly to bone. If fractured, this support is lost and stem subsidence may occur.
Lastly, the resection surface is reamed to achieve an even plane for the collar. The reamer is placed over the broach and rotated while maintaining the resection angle. Excessive pressure is avoided in osteoporotic bone. A freely swiveling reamer confirms the surface is prepared.
The canal is now shaped for secure stem fixation: the rasp is stable at the resection level, laterally positioned to avoid varus, and aligned with the calcar for correct anteversion. The calcar appears intact with no fractures identified.
Trialing the Components
The goal of trialing is to verify that the selected prosthetic components restore optimal hip function before final implantation. This includes confirming appropriate leg length and offset, assessing stability through full range of motion, and ensuring proper soft tissue tension to prevent both dislocation and impingement.
According to the preoperative plan, a trial neck with the predetermined angle and size is selected and inserted onto the trial stem.
The trial neck height relative to the trochanter tip level can be assessed at this point.
This should correspond to the planned center of rotation level relative to the trochanter tip in the preoperative templating.A trial head is selected based on the measurement of the resected femoral head and inserted onto the trial neck.
Before reduction, the acetabulum is inspected with a finger to ensure no bone fragments or tissue have fallen into it, interfering with the reduction.
The retractor is removed to allow access for hip reduction. A clamp is applied to hold the anterior capsule edge clear, preventing tissue interposition during reduction.
The hip is reduced by guiding the prosthetic head into the acetabulum with the head impactor while the assistant applies longitudinal traction and internal rotation to the femur.
A systematic assessment now verifies leg length and offset restoration through soft tissue tension testing and muscle alignment, along with stability and range of motion.
The hip is taken through extension and flexion to confirm adequaterange of motion without restriction.
Internal rotation is tested to confirm the hip does not dislocate posteriorly.
External rotation is tested to confirm anterior stability.Soft tissue tension is assessed with lateral traction or pull. The hip should demonstrate slight movement in flexion and minimal movement in extension. Excessive tightness can restrict movement and predispose to dislocation, while excessive laxity risks instability.
An additional verification method is to assess whether the gluteus medius tendon aligns properly with its anatomical position on the greater trochanter, without significant mismatch. Proper alignment indicates appropriate offset and component sizing.
With the trial components verified as satisfactory, the hip is dislocated with external rotation and longitudinal traction. The trial head, neck, and stem are removed.
Following trial reduction, the calcar region is inspected once more carefully for any fissures or fractures.
With the final component specifications verified through trialing, preparation for cementing can begin.
Preparations for Cementing
Once cement mixing begins, working time is limited. Therefore, preparatory steps and instrument verification must be done in advance.
A cement restrictor plug is inserted into the medullary canal to prevent cement from migrating too far distally. Plug size is determined using trial plugs, and the depth of insertion is determined by measuring the plug inserter against the final stem to position it 1 to 2 centimeters deeper.
Gauze packs are placed in the acetabulum to protect it in case of cement overflow. Cement that inadvertently enters the acetabulum is difficult to remove and interferes with articulation.
Before mixing cement, all necessary components and instruments are verified and positioned within reach.
With the instruments and components ready, cement mixing can begin while the femoral canal is irrigated and dried.
Cementing and Implanting the Components
The bone cement is mixed until homogeneous and loaded into the cement gun.
The leg is held by the assistant with the tibia pointing toward the floor, maintaining external femoral rotation, and the retractor is positioned to elevate the femur for proper canal access.
The tip of the cement gun is inserted to the bottom of the femoral canal, filling the canal from bottom to top.
After cement insertion, a brief waiting period allows the cement to reach optimal consistency for stem insertion, typically around 2 minutes, varying with cement type and room temperature. Readiness can be assessed by touch: the cement should no longer adhere to a gloved finger.
The stem is advanced carefully, maintaining lateral positioning to avoid varus malpositioning, and controlling rotation to preserve the built-in anteversion of this model.
The stem is advanced fully until it reaches the predetermined depth.
Large bone-holding forceps can be applied to hold the stem in position while the cement sets.
Excess cement is removed from around the stem while still soft to prevent hardened fragments from causing impingement.
Setting time varies by cement type and room temperature but is typically 11 to 12 minutes. The leftover cement from mixing can serve as an indicator. Hardening is confirmed when tapping it against a metal surface produces a sharp click, indicating complete setting.
When the cement is hardened, the gauze packs are removed and the acetabulum is palpated to confirm it is clear.
The joint capsule edges are grasped with forceps on both sides of the incision to prevent capsular tissue from becoming interposed during reduction.
The final femoral head component is positioned and seated firmly with an impactor and mallet.
With the components fully assembled, the hip is ready for reduction and final stability testing.
The prosthesis is now fully implanted and the joint is stable. The surgical field can be irrigated before proceeding with wound closure.
Closure
Closure aims to secure the gluteus medius for abductor function and achieve hemostasis at all levels. The other layers to close are the capsule, fascia, subcutaneous tissue, and skin.
The capsule is closed securely by reapproximating both components of the inverted T-shaped incision using strong absorbable braided sutures, for example size 2.
Secure reattachment of the gluteus medius to the anterior greater trochanter is critical to restore hip abduction strength. This is achieved by suturing the tendon through bone tunnels. Two transosseous tunnels are created through the anterior greater trochanter.
Strong non-absorbable braided suture is used for tendon-to-bone fixation. The suture is passed through the tendon and transosseous tunnel twice to reinforce fixation. Both sutures are placed before tying to allow optimal tension adjustment.
Then, additional sutures are placed distally and proximally to close remaining gaps.
The fascia is closed inferiorly with interrupted absorbable sutures.
The superior muscular portion can be closed with continuous absorbable suture.The subcutaneous layer is closed with continuous absorbable suture to eliminate dead space.
Approximation is achieved without excessive tension.The skin is closed with either interrupted sutures or skin staples according to preference.
To access the full video and additional content on this subject, log in or subscribe
Piftalls and Complications
Pitfalls
Incorrect Site of Incision
In the Hardinge approach, the hip is dislocated anteriorly by external rotation. An incision placed too posteriorly can make reaching the anterior capsule and dislocating the hip difficult. The incision should be centered at the midline of the greater trochanter or slightly anterior.
Extending the incision too far proximally risks injury to the superior gluteal nerve, which runs between the gluteus medius and minimus. This can result in abductor weakness. Proximal dissection should be limited to 3–5 cm above the tip of the greater trochanter.
Disorientation During Surgery
Disorientation can occur, especially in obese patients where landmarks can be less palpable. After skin incision, the greater trochanter should be palpated frequently to maintain the correct direction lateral to it.
Careless Tissue Handling
When detaching the gluteus medius from the greater trochanter, only the anterior portion should be released. The posterior attachment should be preserved to maintain abductor function.
Proximal to the trochanter tip, the muscle split should be blunt and in line with the fibers. Sharp dissection or extending beyond 3–5 cm risks injury to the superior gluteal nerve running between the gluteus medius and minimus muscles.
During Charnley retractor placement, the posterior blade should be kept superficial at the fascial level. The sciatic nerve runs deep and posterior. A deeply placed retractor can cause injury. This risk is more prominent in the posterior approach, but caution is still warranted.
Using Excessive Force on Osteoporotic Bone
During canal opening and broaching, controlled force is essential. Especially osteoporotic bone is fragile; excessive mallet strikes can cause fissures or fractures of the femur.
The calcar area is particularly important for prosthesis stability. If fractured, the collar can lose its support and the stem may subside, resulting in leg length loss and potential loosening.
Implant Positioning Errors
Wrong Resection Level of the Neck
The resection level determines stem depth. A wrong level, usually too proximal, can result in leg length discrepancy and altered offset. The level should be confirmed against the preoperatively templated distance from the lesser trochanter before resection.
Too Medial Entry Point
A medial entry during canal opening can lead to varus alignment and an undersized stem. The entry point should be at the lateral border of the resection, close to the greater trochanter.
Wrong Anteversion Reference
Some stems have built-in anteversion; aligning the rasp with the calcar sets rotation correctly. Other systems may require anteversion to be estimated and set intraoperatively. Using the wrong reference for the implant system can result in incorrect rotation and increased dislocation risk. Manufacturer guidance should be followed.
Improper Prosthesis Component Sizing
Implanting a femoral component or head of incorrect size, or choosing a wrong neck angle, can lead to instability, impingement, or leg length discrepancy. Preoperative templating helps guide prosthesis sizing, but intraoperative trialing is essential to verify stability, range of motion, and leg length before final implantation.
Inadequate Cement Removal
Excess cement left around the prosthesis can cause impingement, restricting joint movement and increasing wear. In hemiarthroplasty, cement debris in the acetabulum is particularly harmful as the prosthetic head articulates directly with native cartilage. After stem insertion, excess cement should be carefully removed before it hardens.
The acetabulum should be protected with gauze during cementing.
Complications
Superior Gluteal Nerve Injury
The superior gluteal nerve runs between the gluteus medius and minimus, typically 3–5 cm proximal to the tip of the greater trochanter. Injury can result from sharp incision of the muscle layer in this area. Limiting proximal dissection to 3–5 cm above the trochanter tip and using blunt muscle splitting protects the nerve. Injury to this nerve can cause abductor weakness and Trendelenburg gait.
Intraoperative Fracture
Fissures or fractures can occur during canal opening and broaching, particularly in osteoporotic bone. Controlled mallet force and appropriate stem sizing reduce this risk. The calcar area should be inspected during and after broaching; a fracture may require fixation. A change in resistance during stem insertion can also indicate a fracture. The greater trochanter can fracture if excessive bending forces are applied during lateral preparation.
Abductor Weakness
Abductor function can be compromised by superior gluteal nerve injury or by not repairing the detached gluteus medius attachment site. Weakness can result in persistent limp and functional limitation.
Leg Length Discrepancy
Incorrect stem depth or resection level affects leg length and offset. This can cause limp, back pain, and patient dissatisfaction. The resection level should be confirmed against preoperative templating, and stem depth verified during trialing.
Instability / Dislocation
Instability is less common in hemiarthroplasty than in total hip replacement due to the larger head size. The Hardinge/direct lateral approach also has lower dislocation rates than the posterior approach. However, dislocation can still occur from wrong anteversion angle, inadequate soft tissue tension, or component sizing error.
Stem Subsidence
Subsidence occurs when the stem sinks into the femur after implantation. This can result from calcar fracture, where the collar loses its bony support, or from deficient cement fixation. Subsidence causes leg shortening and loss of offset.
Loosening
Loosening occurs when the stem is no longer stably fixed. Varus alignment and thin cement mantle increase the risk. Loosening presents as pain and may require revision surgery.
Aftercare
General Guidelines
The institution’s guidelines should be followed. Postoperative x-rays, including pelvis AP and lateral views, are obtained for verification of correct placement of the prosthesis and to rule out any complications. Full weight-bearing is usually allowed immediately.
FAQ
Why is hip hemiarthroplasty used for displaced femoral neck fractures?
Hip hemiarthroplasty replaces the damaged femoral head and neck with a prosthesis when compromised blood supply makes bone healing unlikely. This restores hip function and enables immediate or early weight-bearing.
What is the goal of the operation?
The goal is to replace the fractured femoral neck and head with a prosthetic implant to restore stability and function of the hip joint and facilitate early mobilization.
What is the Hardinge approach in this procedure?
Using the Hardinge approach, the gluteus medius and minimus are split to reach the joint in the anterior direction. After capsulotomy, the hip is dislocated anteriorly.
How is the incision planned?
The incision is planned at the midline of the lateral surface of the greater trochanter or slightly anterior in the AP direction. It begins approximately 5 cm proximal to the trochanter tip and extends distally in line with the femoral shaft, ending approximately 10 cm inferior to the trochanter tip.
Why is proximal dissection limited?
Proximal dissection is limited to 3–5 cm above the tip of the greater trochanter to protect the superior gluteal nerve, which runs between the gluteus medius and minimus.
Why is lateral entry into the femoral canal important?
A lateral entry point helps allow neutral stem alignment. A medial canal entry site makes varus alignment more likely, which can result in an undersized stem and early loosening.
What is checked during component trialing?
Trialing verifies leg length and offset restoration, stability through range of motion, and proper soft tissue tension. The hip is tested in extension, flexion, internal rotation, and external rotation.
Why is the calcar inspected?
The calcar is inspected for fissures or fractures because the collar of the prosthesis rests there and transfers load directly to bone. If the calcar is fractured, this support is lost and stem subsidence may occur.
How is the acetabulum protected during cementing?
Gauze packs are placed in the acetabulum to protect it in case of cement overflow. Cement that enters the acetabulum is difficult to remove and can interfere with articulation.
What aftercare is described?
The institution’s guidelines should be followed. Postoperative x-rays, including pelvis AP and lateral views, are obtained to verify correct placement of the prosthesis and rule out complications. Full weight-bearing is usually allowed immediately.
To access the full video and additional content on this subject, log in or subscribe